If you are an avid computer user, you probably spend a significant amount of time typing on your keyboard. It’s frustrating when a key on your keyboard becomes unresponsive or gets stuck, especially if it’s due to a broken pin on the keyboard switch. This issue can occur due to various reasons, such as accidental damage or wear and tear over time. Fortunately, there are several solutions you can try to fix the problem. In this article, we will explore different methods to tackle the issue of a broken pin on the keyboard switch located on the PCB (Printed Circuit Board).
What Should I Do If the Pin of the Keyboard Switch is Broken on the PCB?
When you encounter a broken pin on the keyboard switch, follow these steps to address the issue effectively:
1. Identify the Affected Key
The first step is to identify the specific key with the broken pin. Usually, the malfunctioning key will either not respond when pressed or get stuck in the down position. Once you have identified the affected key, you can proceed to the next steps to address the problem.
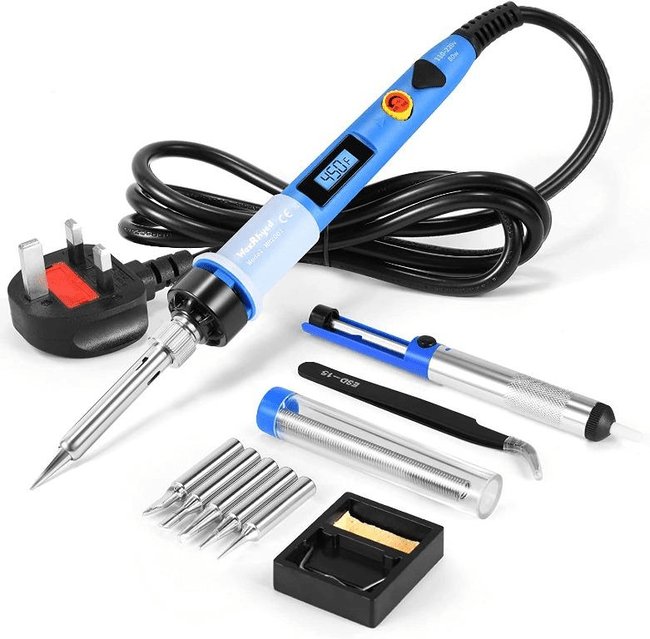
2. Gather the Necessary Tools
Before attempting any repair, ensure you have the required tools for the job. You may need a precision screwdriver, a soldering iron, solder wire, a desoldering pump, and a replacement switch (in case the existing one is beyond repair).
3. Power Off Your Computer
Before you start any repair work on your keyboard, it is essential to turn off your computer and unplug the keyboard from the USB port. This precaution will protect you from any potential electric shock and prevent any accidental damage to your system.
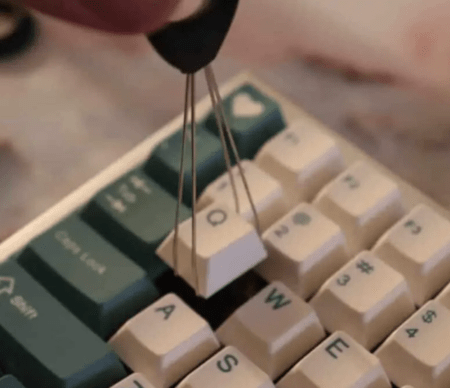
4. Remove the Keycap
To access the broken switch pin, gently remove the keycap from the affected key. Use a keycap puller or a flat object like a credit card to avoid damaging the keycap or the surrounding keys.
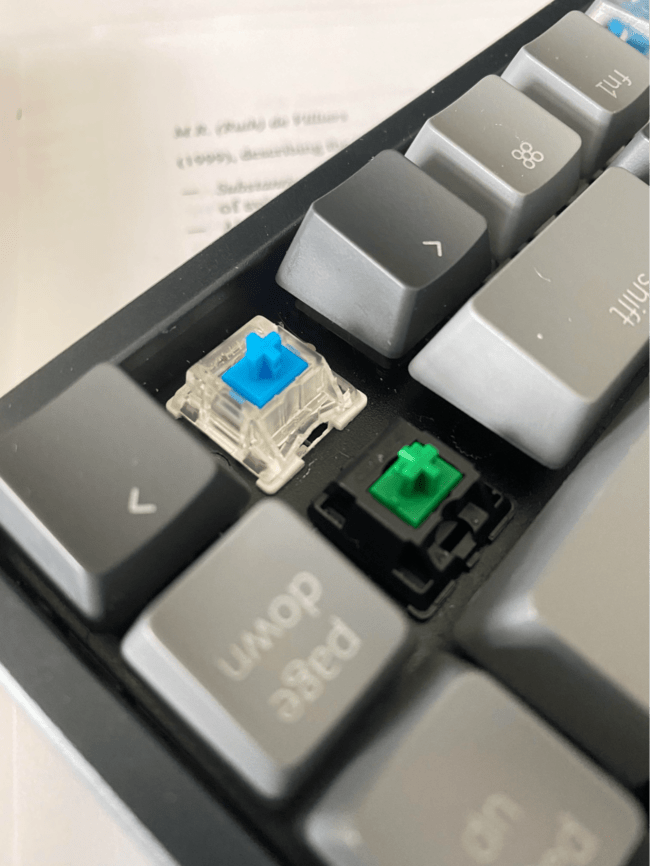
5. Inspect the Broken Pin
Once the keycap is removed, take a closer look at the switch beneath. You should be able to see the broken pin or any other visible damage. Make sure to handle the keyboard and the components with care during this process.
6. Check for Loose Connections
Sometimes, the issue might not be with the broken pin itself but with the soldering connections. Inspect the solder joints on the switch and the PCB to see if any of them are loose or disconnected.

7. Attempt a Repair
If the broken pin is not severely damaged and the connections are intact, you can try to repair it by carefully re-soldering the pin to its place. Use the soldering iron and solder wire to perform this task.

8. Replace the Keyboard Switch
In cases where the pin is irreparable or the switch is faulty beyond repair, you will need to replace the keyboard switch. Remove the broken switch by desoldering it from the PCB, and then solder the new switch into place.
9. Test the Key
After repairing or replacing the switch, test the key to ensure it is functioning correctly. Press the key multiple times to check for responsiveness and smooth operation.
10. Reassemble the Keyboard
Once you have confirmed that the key is working properly, reassemble the keyboard by putting the keycap back in place. Ensure that the keycap is aligned correctly and sits firmly on the switch.
11. Power On and Test
Connect the keyboard back to your computer and power it on. Test all the keys, including the one you repaired, to ensure everything is functioning as expected.
12. Update Keyboard Firmware
In some cases, a firmware update for your keyboard might resolve issues with broken switch pins. Visit the manufacturer’s website and follow the instructions to update the keyboard firmware if available.
13. Use External Key Remapping Software
If you encounter any lingering issues with the repaired key, you can use external key remapping software to remap the key’s function to another key. This can be a temporary solution if the key is still not functioning as expected.
14. Clean Your Keyboard Regularly
To prevent future issues with broken switch pins, make it a habit to clean your keyboard regularly. Dust, debris, and dirt can accumulate under the keycaps, affecting the key’s performance over time.
15. Consider Professional Repair
If you are not comfortable with repairing the keyboard yourself or the issue persists despite your efforts, consider taking the keyboard to a professional repair service. They will have the expertise and tools to diagnose and fix the problem effectively.
Frequently Asked Question (FAQs)
Q: Can I fix a broken keyboard switch pin without any technical expertise?
A: While some repairs can be done by beginners, fixing a broken keyboard switch pin requires some technical knowledge and skill with soldering. If you are unsure, it’s best to seek professional help.
Q: How long will it take to repair a broken switch pin on the keyboard?
A: The time it takes to repair a broken switch pin can vary depending on the extent of the damage and your experience with keyboard repairs. It may take anywhere from 30 minutes to an hour or more.
Q: Should I replace all the switches if one of them is broken?
A: If only one switch is broken, there is no need to replace all the switches. Focus on repairing or replacing the faulty switch while leaving the others untouched.
Q: Can I use a different type of switch as a replacement?
A: Yes, you can use a different type of switch as a replacement if it is compatible with your keyboard model. However, keep in mind that the feel and performance of the replaced key may differ from the others.
Q: Is it necessary to update the keyboard firmware after repair?
A: While it’s not always necessary, updating the keyboard firmware can help resolve some issues, including those related to broken switch pins. It’s a good idea to check for firmware updates after repair.
Q: How often should I clean my keyboard?
A: It’s recommended to clean your keyboard every few months, depending on your usage. Regular cleaning can help prevent issues and maintain the overall performance of your keyboard.
Conclusion
Dealing with a broken pin on the keyboard switch can be frustrating, but with the right approach, you can successfully address the issue. Whether it’s a minor repair or a switch replacement, following the steps outlined in this article can help you get your keyboard working smoothly again. Remember to exercise caution during the repair process, and if you encounter any challenges, don’t hesitate to seek professional assistance. By taking good care of your keyboard and addressing issues promptly, you can enjoy a seamless typing experience for a long time to come.
For more keyboard troubleshooting tips and tech guides, check out our website. Happy typing!