Are you concerned about the dangers of radon gas in your home? If so, then you are not alone.
Radon is a radioactive gas that can seep into buildings from the soil and can be harmful to our health. Installing a radon vent pipe system is a straightforward and essential step in safeguarding your home and loved ones. In this post, we will guide you through the crucial processes involved.
By the end of this post, you will have all the information and insights necessary to start the installation process and ensure your family’s safety.
1. Conduct a Thorough Evaluation of Your Home
The first step in installing a radon vent pipe system is to conduct a thorough evaluation of your home. This is a crucial process as it helps to identify any potential risks and determine the best course of action for mitigating them. During this evaluation, a certified professional will conduct various tests and assessments to measure the levels of radon gas in your home.
They will also inspect the foundation, basement, and crawl spaces to determine the most suitable location for the vent pipe. This thorough evaluation ensures that the radon vent pipe system is installed, providing you with a safer and healthier living environment.
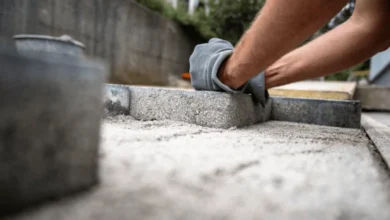
2. Create a Pathway for the Pipe
Once the location of the pipe has been determined, the next process is to create a clear and direct pathway for it. This involves mapping out the route for the pipe, taking into consideration any potential obstacles or obstructions along the way.
It is important to ensure that the pathway is free from any bends or kinks to allow for smooth airflow. Additionally, proper sealing and insulation of the pathway are necessary to prevent any leaks and ensure the effectiveness of the system.
3. Make Necessary Seals and Connections
This is a critical process, as any gaps or leaks in the system could allow radon gas to escape and defeat the purpose of the radon mitigation system installation. It is important to seal all joints and connections with high-quality sealant to ensure a tight and secure fit. Additionally, residents must seal any penetrations through floors or walls to prevent radon gas from entering the living space.
By following this step, homeowners can have peace of mind knowing that the radon pipe system is properly sealed and will reduce the levels of this harmful gas in their homes. Don’t wait any longer, check out the radon testing now to protect your family’s health.
4. Test and Monitor
The first part of this process involves performing a radon test to measure the levels of gas in the home. This can be done using a do-it-yourself test kit or by hiring a professional.
Once the test is complete and the system has been operating for enough amount of time, it is important to regularly track the levels of radon to ensure that they remain at a safe level. By testing and monitoring the system, homeowners can have peace of mind knowing that their home is free from the harmful effects of radon gas.
Master the Process of Installing a Radon Vent Pipe System
The processes of installing a radon vent pipe system are vital for ensuring a safe and healthy home. From preparing the area to securing the piping and installing proper fans and seals, every step is crucial for effective radon mitigation.
Don’t wait. Take action and schedule an installation to protect your loved ones from the dangers of radon gas. Choose a trusted professional and safeguard your home today!
Like this article? Read more about these topics on our blog.