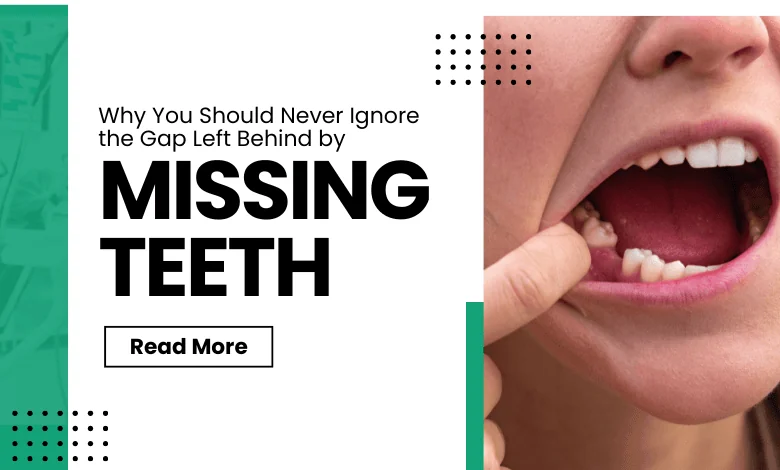
EntertainmentLifestyleTechnology

How to Take Photos for Instagram: The Ultimate Guide

You don’t have to have a professional photographer to get good shots for Instagram.

All you need is a little knowledge, a newer phone, and creativity to get more engagements and followers.

Keep reading to find the ultimate guide on how to take photos for Instagram.

How to Take Photos for Instagram: Know Your Purpose

Before diving into the how-tos, you should first identify why you want better photos on your profile.

If you’re a personal poster looking to boost your aesthetics, then you can go about the process more casually than someone looking to increase sales for their business.

In the case that you’re running a business, you should improve your posts to build your brand, create a loyal audience, and generate more sales. Having clean and aesthetic photos can do that, along with paid advertisements and SEO tactics.

In general, you can try any of the following tips and see how your followers respond. Start by seeing which of your posts get the most likes and try to identify why that is. This will give you a specific direction to go in.

For example, if you get more likes on portraits of people than you do on landscapes, you should focus on improving your portrait shots. If you’re just starting out or have a small following, you can look towards successful pages to see the types of best Instagram photos that people are liking.

Regardless of your purpose, you should make your pictures unique, personal, and creative while following these tips.

Lighting is Everything

Light is the only reason that we can see and capture pictures. As such, it’s the most important factor to consider when getting photography Instagram ideas.

You should generally aim for natural lighting, as this makes the picture look rich and authentic. Bright, direct light can be hard to work with, so try shooting during “golden hour”.

This is the time of day around sunset when the light is even and gentle. You won’t get the same glares and overexposure that you could get during midday.

If you’re shooting during other times, utilize the exposure adjustment on your camera. While in the app, simply tap the screen and a small sun icon should appear. You can slide it up or down to change the amount of light coming into the lens.

Play around with this to get an idea of how exposure changes a photo. Be careful with this feature though, as both over and underexposed shots tend to look unnatural.

Alternatively, you can use artificial light for portraits and product photography. Setting up balanced light from multiple sources is critical here. Reference vloggers for an example of what you should aim for.

Also Read:

Why More People Are Into Instagram Reels These Days

Set Up a Good Composition

Photo composition refers to the arrangement of various elements in your shot. This includes the subject or focus, the foreground, and the background.

If you want to have an easy method of setting up your composition, go to your camera settings and turn on “grid mode”. This divides the screen into 9 equal squares.

Using the grid, you can take pictures using the “rule of thirds”. This is when you align your subject along the lines of the grid. It may seem like a small thing to do, but studies show that people find photos following the rule of thirds more aesthetically pleasing.

You also want to be mindful of what’s in the foreground and background of your pictures. Just like you wouldn’t take a mirror selfie in a nasty background, you shouldn’t take pictures that have undesirable distractions within the frame.

Another thing to keep in mind with these Instagram tips is to leave enough space around the subject. Using your phone zoom is essentially cropping the photo in the shot, which limits how you can use the picture on social media.

Instead, leave “white” or “empty” space around your subjects. That way, you can crop it to fit your feed whenever you’re ready to post it.

YOU MIGHT ALSO LIKE:

How to Grow Your Real Instagram Audience – Tips and Insights from Social Media Marketing Pros

Understand Depth of Field

Your depth of field (DOF) is the dimension of your photo. It’s what you can see in front of and behind the main subject.

An example of DOF is the Instagram trends including portraits of people with a hazy background. Many phones have a “portrait mode” setting that automatically shortens the depth of field so that you only pay attention to the person in the photo.

This is done by adjusting the aperture. In professional photography, the aperture is measured in f stops. The smaller the f stop number, the further the range of focus extends. A larger f stop shortens the range of focus, which is what the “portrait mode” accomplishes.

While you don’t need to know the technicalities of adjusting the aperture to know how to use Instagram, it’s helpful for creating awesome posts.

This is because your eyes work with a similar mechanism. Naturally, your iris changes the size of your pupil to make it smaller or bigger, adjusting the amount of light let in. If you look directly at an object next to you, you’ll notice that your eyes focus on it and make the other details of your environment blurry.

Knowing this process in both your eyes and photography helps you take specific shots. For example, if you want your viewers to focus on a plate of food or a plant, you may want the rest of the photo to be somewhat blurred so that their focus is forced to the subject.

Get Creative

You won’t gain Insta likes by taking run-of-the-mill pictures.

You’ll need good lighting, a strong composition, a balanced depth of field, and finally, some creativity.

To make your photos stand out, try changing the perspective that you’re taking the photo. Rather than taking pictures level and straight-on, play with standing above your subject, tilting your camera, and using reflections and shadows to stand out.

You can also get creative with the background elements in your photos. For example, one factor that many Instagram trends utilize is “leading lines”. These are horizontal and verticle lines in the background of your photo.

They could be roads, signs, trees, or anything that creates a sharp line. These features lead the viewers’ eyes across the photo, which creates a more natural viewing experience. If there aren’t leading lines or a strong focus in the photo, people’s eyes have to dart around to find the most “important” feature.

The most important takeaway here is to experiment and find what works for you and your followers. Try incorporating one element at a time and seeing how your viewers respond.

It will take a little time to find what works for your niche, but it’s well worth the effort.

Start Getting More Engagement

Now that you know how to take photos for Instagram, you can turn on your camera and start getting better shots.

Try new things and see what works for you. In the meantime, keep reading our blog for more technology trends.

Related Post:

Cheryl Henson

Cheryl Henson is a passionate blogger and digital marketing professional who loves writing, reading, and sharing blogs on various topics.

Related Articles

Back to top button